
Close your eyes and listen for the distinct, rhythmic sizzle of cold protein hitting a heavy-bottomed skillet. That sound is the beginning of a chemical transformation known as the Maillard reaction; it is the holy grail of high-quality keta salmon recipes. If you have ever dismissed keta as the "lean cousin" of the salmon family, you are about to have a major culinary epiphany. This fish is a blank canvas for flavor because it lacks the heavy, oily profile of King or Sockeye. It is the sophisticated, firm-textured choice for those who want a clean finish without the fishy aftertaste. We are diving into nine specific hacks that leverage molecular science to turn this lean wild-caught gem into a buttery, melt-in-your-mouth masterpiece. Whether you are searing it to a crisp or poaching it in a bath of aromatic fats, mastering these keta salmon recipes will elevate your weeknight rotation from "fine" to "five-star." Grab your apron; we are about to make some kitchen magic.
The Gathers:
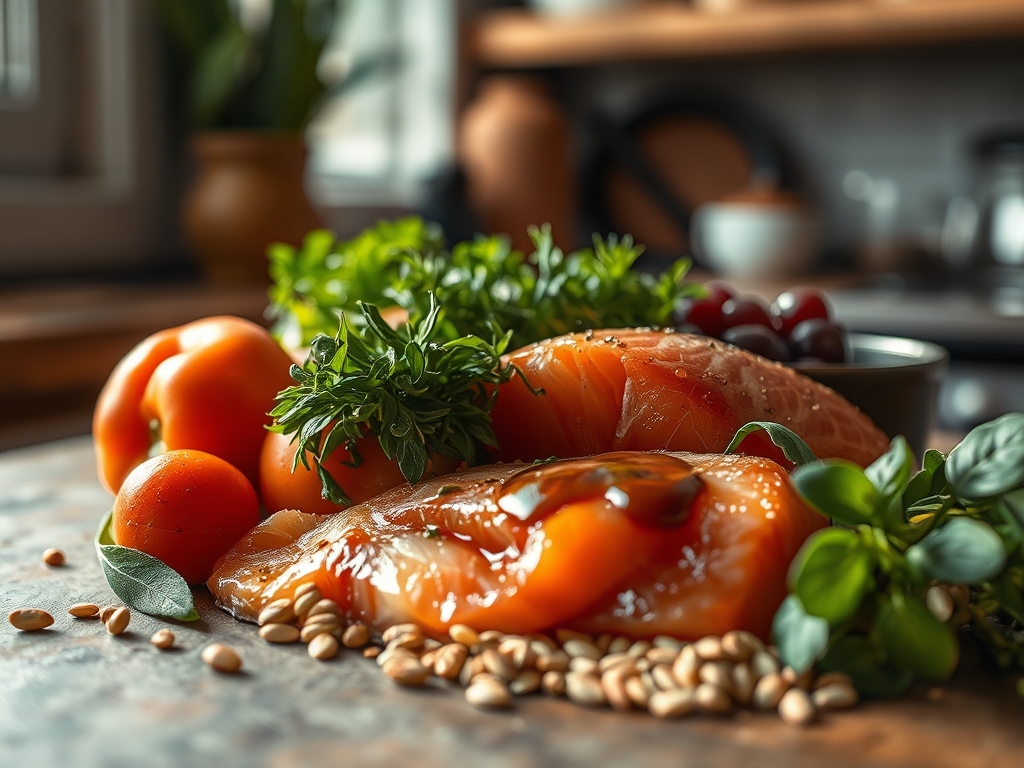
To execute these hacks, your mise-en-place must be precise. Keta salmon is lean, meaning it has a lower lipid content than other species. You will need high-quality fats to provide a viscous mouthfeel. Gather 1.5 pounds of wild-caught keta fillets, skin-on for structural integrity. You will also need "The Holy Trinity of Moisture": grass-fed butter, extra virgin olive oil, and a piquant acid like fresh lemon or rice vinegar.
For the aromatics, use a microplane to zest two lemons and grate a thumb of fresh ginger. This maximizes surface area, allowing the essential oils to infuse your cooking medium instantly. You will also need flaky sea salt to manage osmotic pressure and freshly cracked white pepper for a subtle heat.
Smart Substitutions: If you are avoiding dairy, swap the butter for a high-smoke-point avocado oil or a rich coconut cream to maintain that luxurious texture. Instead of refined sugar in glazes, use honey or maple syrup to encourage enzymatic browning at a lower temperature.
The Clock:
Efficiency in the kitchen is all about "Chef's Flow." This is the art of sequencing tasks so that no component sits idle. Your total active prep time is 15 minutes, with a cooking window of 8 to 12 minutes depending on the thickness of the fillets.
Start by tempering your fish; take it out of the refrigerator 20 minutes before cooking. This prevents "thermal shock," which causes the muscle fibers to contract violently and push out moisture. While the fish reaches room temperature, prepare your sauces and garnishes. The "Flow" dictates that your side dishes should be nearly finished before the salmon ever touches the heat. Because keta cooks rapidly, it requires your undivided attention during the final 120 seconds of the sear.
The Masterclass:
1. The Dry-Brine Technique
Before you even think about heat, sprinkle your fillets with a mixture of salt and a pinch of sugar. Let them sit for 15 minutes. This process, known as denaturation, alters the protein structure to help the fish retain water during the cooking process.
Pro Tip: This creates a "tacky" surface called a pellicle, which allows smoke and seasonings to adhere better while preventing the white albumin from leaking out.
2. The Ice-Cold Skin Start
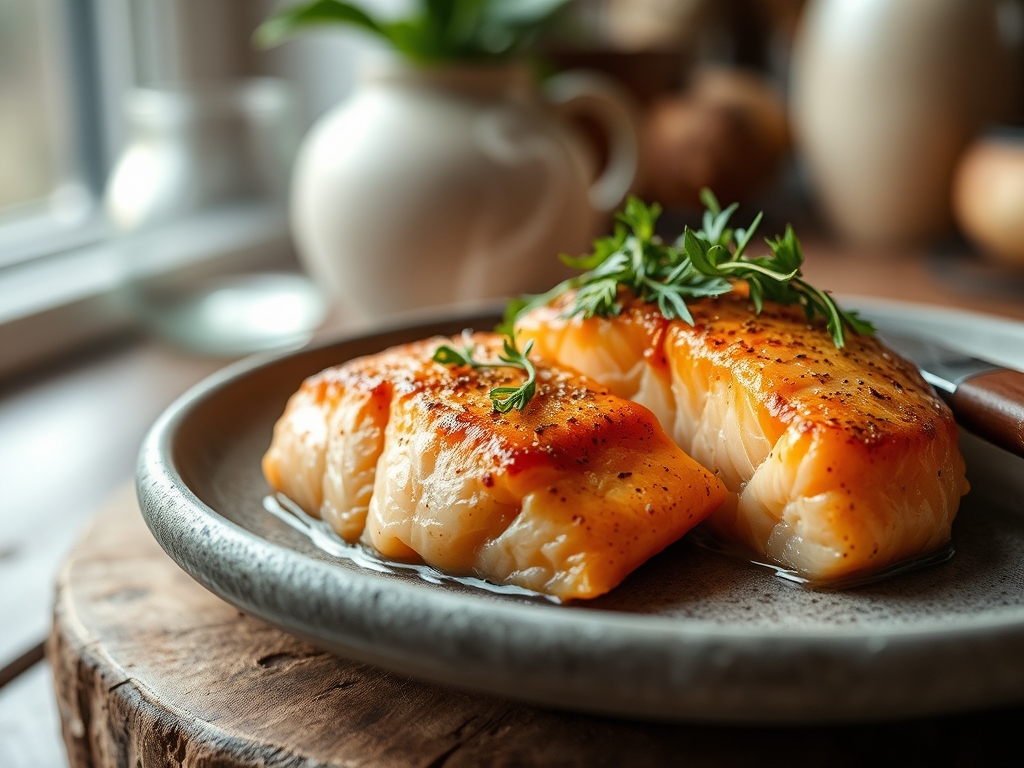
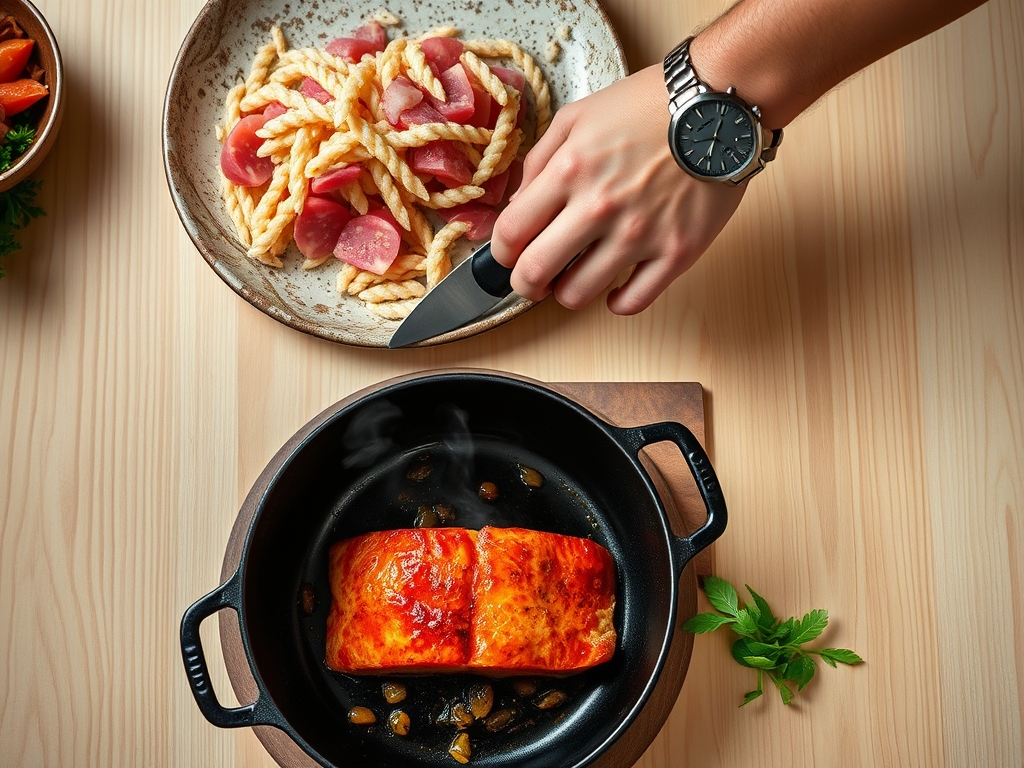
Place your fillets skin-side down in a cold, dry heavy-bottomed skillet, then turn the heat to medium-high. This allows the fat beneath the skin to render slowly, resulting in a glass-like crunch.
Pro Tip: Starting cold prevents the skin from curling, a result of rapid protein contraction, ensuring even contact with the heat source.
3. The Butter Baste (Arrosé)
Once you flip the fish, drop a knob of butter and a sprig of thyme into the pan. Use a large spoon to continuously douse the flesh with the foaming fat.
Pro Tip: The milk solids in the butter undergo the Maillard reaction, creating nutty flavor compounds that permeate the lean meat.
4. The Acid Flash
Just before pulling the pan off the heat, deglaze with a splash of dry white wine or citrus juice. The steam will gently finish the interior without overcooking the exterior.
Pro Tip: Acid breaks down residual connective tissues, resulting in a more tender "flake" when you insert a fork.
5. Thermal Carryover Management
Remove the salmon when the internal temperature hits 125 degrees Fahrenheit. Use a digital scale or meat thermometer to be precise.
Pro Tip: Heat continues to move from the outer edges to the center even after the fish is off the pan; this is thermal carryover, which will bring your fish to a perfect 130-135 degrees.
6. The Emulsified Glaze
If making a sauce, use a saucier to whisk cold butter into a reduced balsamic or soy base. This creates a stable emulsion that coats the fish rather than sliding off.
Pro Tip: Whisking at the very end (monter au beurre) prevents the sauce from breaking into a greasy mess.
7. The Parchment Shield
For oven-roasting, use the "en papillote" method. Wrap the keta in parchment paper with aromatics.
Pro Tip: This creates a pressurized steam environment, which is the most forgiving way to cook lean keta without drying it out.
8. The Microplane Zest Finish
Never cook your citrus zest; grate it directly over the finished plate.
Pro Tip: High heat destroys the volatile aromatic compounds in citrus; adding it last ensures a piquant punch that cuts through the fat.
9. The Bench Scraper Flip
Use a wide fish spatula or a bench scraper to flip the fillets.
Pro Tip: Minimizing the "agitation" of the fish prevents the delicate flakes from separating prematurely, preserving the moisture trapped between the layers.
The Deep Dive:
Macro Nutrition: Keta salmon is a nutritional powerhouse. It is lower in calories than Atlantic salmon but remains packed with Omega-3 fatty acids and Vitamin B12. It is the ideal choice for high-protein, low-fat diets.
Dietary Swaps:
- Keto: Replace any honey in glazes with monk fruit sweetener and double down on the butter basting.
- Vegan/Plant-Based: While this guide focuses on keta, the "Acid Flash" and "Aromatic Infusion" techniques work beautifully on salt-baked golden beets.
- GF: Ensure your soy sauce is replaced with Tamari or liquid aminos for all glazes.
The Fix-It:
- Problem: The fish is sticking to the pan. Fix: Do not touch it. The fish will naturally "release" once the skin has fully dehydrated and crisped.
- Problem: White "goo" is appearing on top. Fix: This is albumin. You cooked it too fast or too high. Next time, lower the heat and use the dry-brine hack.
- Problem: The interior is dry but the outside is perfect. Fix: Use a "water bath" or a pan of water on the bottom rack of the oven to increase humidity.
Meal Prep: To reheat keta without it turning into cardboard, use the "Low and Slow" method. Place it in an oven at 275 degrees with a teaspoon of water and cover with foil. This re-hydrates the proteins rather than shocking them with microwave radiation.
The Wrap-Up:
You are now officially armed with the technical prowess to turn keta salmon into the star of your kitchen. Remember, cooking is just delicious chemistry. By focusing on temperature control, moisture retention, and the power of a good emulsion, you have unlocked a world of flavor that most home cooks miss. Go grab those fillets, heat up your skillet, and show that keta who is boss. Your taste buds will thank you.
The Kitchen Table:
How do I stop keta salmon from drying out?
The secret is the "dry-brine" and "carryover cooking." Salt the fish 15 minutes before cooking to lock in moisture, and always remove it from the heat 5 degrees before your target temperature to account for residual heat.
Is keta salmon good for grilling?
Yes, but you must use a cedar plank or foil. Because keta is lean, direct flame can dry it out quickly. The plank provides a buffer and adds a smoky infusion that complements the mild flavor.
What does keta salmon taste like?
Keta has a mild, clean, and non-fishy flavor with a firm texture. It is less oily than Sockeye, making it the perfect vehicle for bold sauces, spicy glazes, or delicate citrus herb infusions.
Can I use frozen keta salmon for these recipes?
Absolutely. Just ensure you thaw it slowly in the refrigerator for 24 hours. Pat it extremely dry with paper towels before cooking to ensure you still get that perfect, crispy Maillard sear on the skin.