
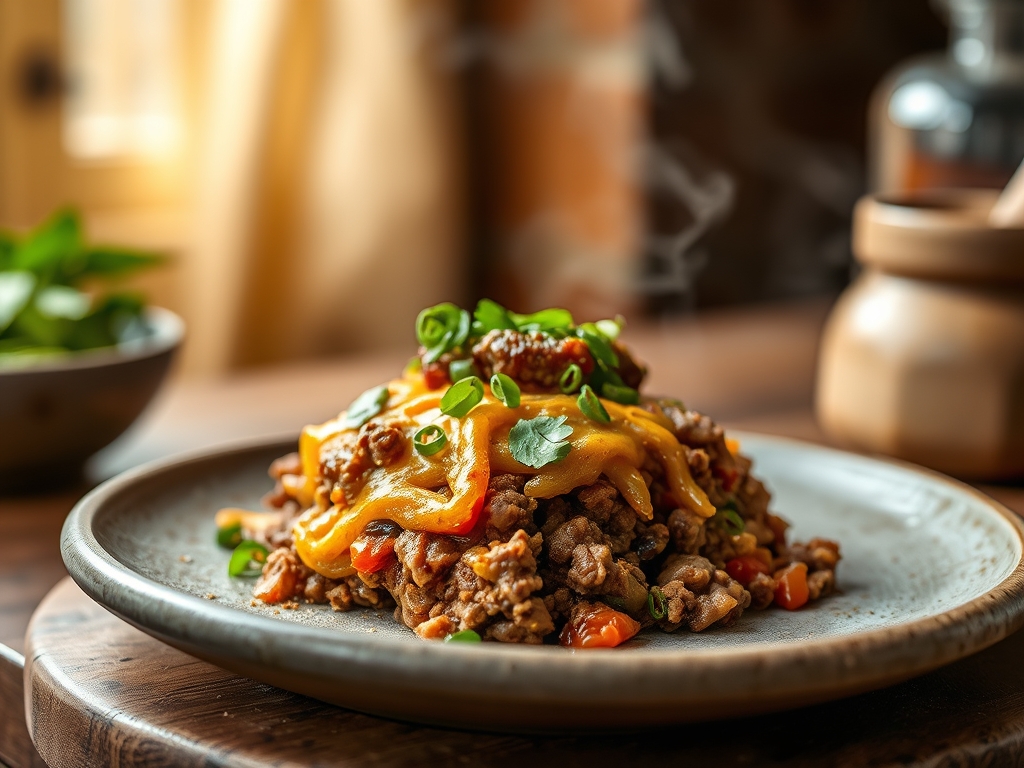
Picture the sound of a heavy-bottomed skillet meeting a high-flame burner; that sharp, rhythmic hiss is the opening note of your new favorite weeknight ritual. We are diving deep into the world of ground beef recipes taco casserole, where the rugged crunch of corn chips meets the velvety richness of molten cheddar and perfectly seasoned protein. This is not just a dump-and-bake dinner; it is a masterclass in layering textures and balancing acidity against fat. We are going to transform humble pantry staples into a structural masterpiece that defies the soggy-bottomed reputation of lesser casseroles. Whether you are feeding a rowdy crowd or prepping for a week of high-protein lunches, these six variations will prove that comfort food can be both intellectually satisfying and unashamedly delicious. Get your digital scale ready, because we are about to calibrate your kitchen for maximum flavor extraction.
The Gathers:
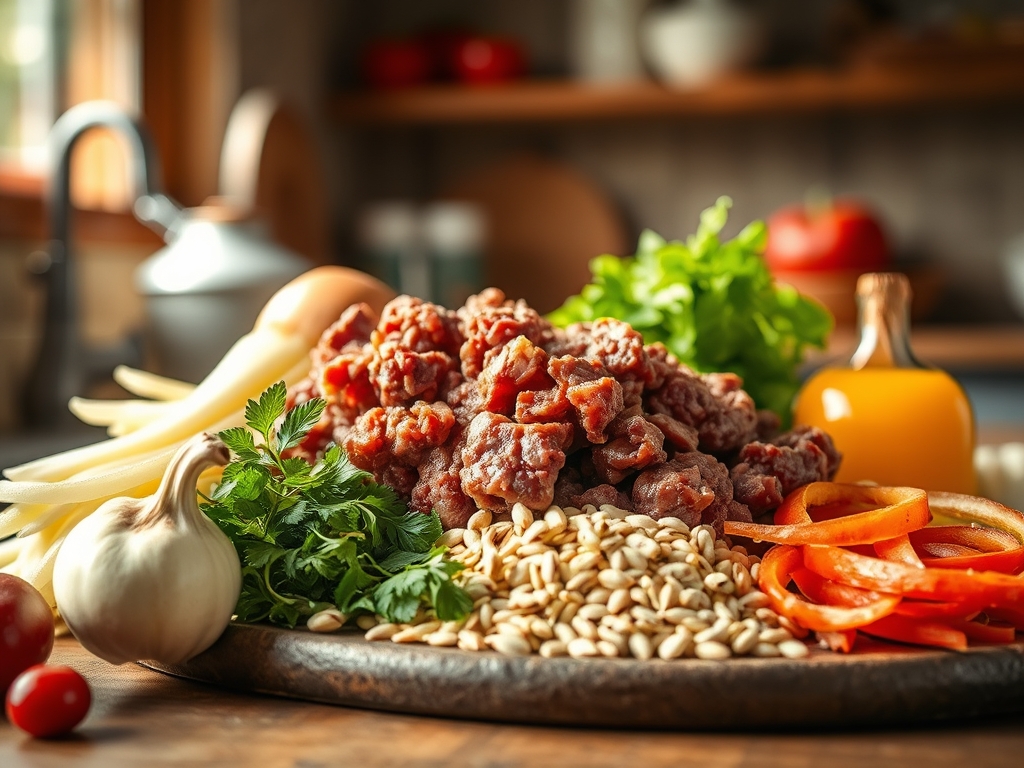
Before we ignite the range, we must curate our mise-en-place with surgical precision. The backbone of our ground beef recipes taco casserole is, unsurprisingly, the beef. Aim for an 80/20 blend; the fat content is essential to render out a flavorful base that will eventually infuse the vegetables. You will need a pound of this high-quality protein, alongside a quart of sharp cheddar cheese that you have grated yourself using a microplane or box grater to avoid the anti-clumping starches found in pre-shredded bags.
For the aromatic base, gather one large white onion and three cloves of garlic. You will want a viscous element to bind the layers, typically a combination of black beans and a piquant salsa roja. The structural crunch comes from thick-cut tortilla chips or corn chips. For smart substitutions, consider swapping the beef for ground bison if you want a leaner, more iron-rich profile. If you are dodging nightshades, replace the salsa with a cumin-heavy pumpkin puree to maintain that earthy depth without the heat. Always keep a bench scraper nearby to quickly transfer your finely diced aromatics from the cutting board to the pan without losing a single drop of juice.
The Clock: Timing the Perfect Bake
Efficiency in the kitchen is all about the "Chef's Flow." Expect a 15-minute preparation window followed by a 25-minute bake. While your oven preheats to 375 degrees Fahrenheit, you will be multitasking. The first 10 minutes are dedicated to browning the meat and softening the aromatics. The final 5 minutes of prep involve the assembly. Once the casserole enters the oven, the thermal energy works to melt the fats and marry the spices. Total time from pantry to table is exactly 40 minutes, making this a tactical win for busy schedules.
The Masterclass:
1. The Maillard Sear
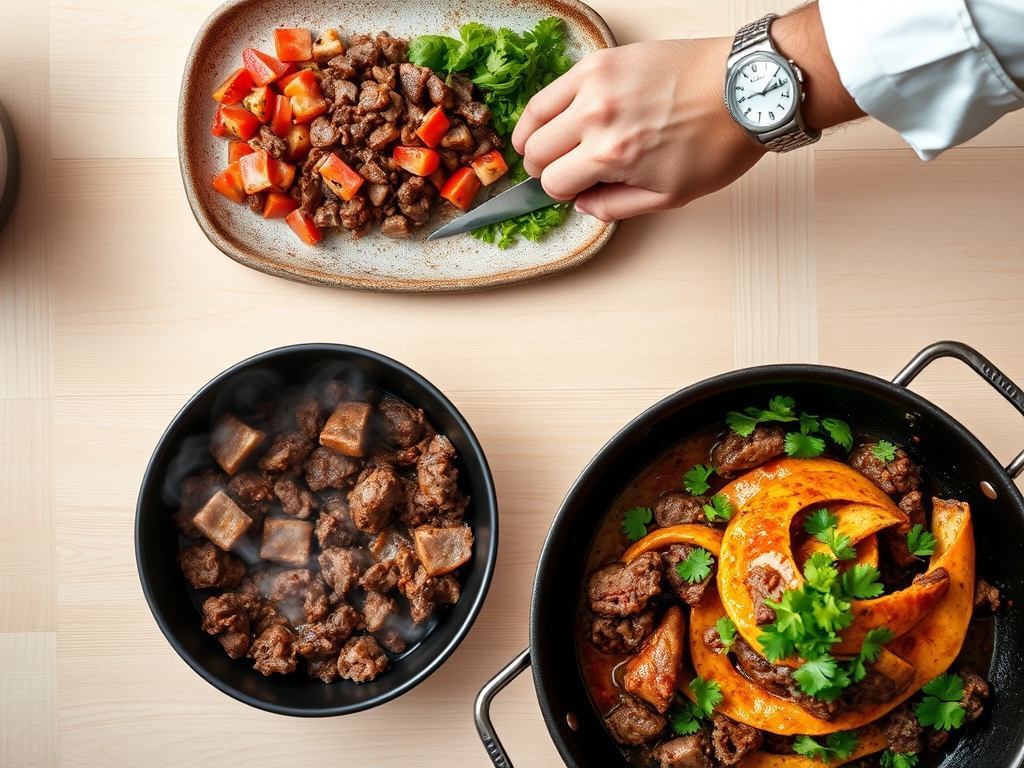
Place your heavy-bottomed skillet over medium-high heat. Once the pan is shimmering, add the ground beef. Do not crowd the pan; you want to achieve enzymatic browning, also known as the Maillard reaction. Use a stiff spatula to break the meat into small, uniform crumbles.
Pro Tip: Avoid moving the meat too much in the first two minutes. This allows the proteins to bond and brown, creating complex flavor compounds that boiling or steaming simply cannot replicate.
2. Deglazing the Aromatics
Once the meat is browned, push it to the perimeter and add your diced onions to the center. Use the moisture released by the onions to deglaze the brown bits (the fond) from the bottom of the skillet.
Pro Tip: This is "flavor recovery." The fond contains concentrated meat juices that, when reincorporated, deepen the savory profile of the entire dish.
3. Spice Infusion and Emulsification
Stir in your cumin, chili powder, and smoked paprika. Add a splash of water or beef stock to create a light sauce. This helps to emulsify the rendered fats with the spices, ensuring every bite is consistently seasoned.
Pro Tip: Fat is a flavor carrier. By blooming your spices in the rendered beef fat before adding liquid, you unlock fat-soluble compounds that stay dormant in dry heat.
4. The Structural Layering
In a 9×13 ceramic baking dish, create a foundation of crushed chips. Top with half the meat mixture, a layer of beans, and a generous handful of cheese. Repeat the process.
Pro Tip: Layering ensures that the heat penetrates the center of the casserole evenly. A dense middle often leads to cold spots, but these air pockets between layers encourage convection.
5. The Final Melt and Crust
Slide the dish into the center rack. Bake until the cheese is bubbling and the edges of the chips are just beginning to darken.
Pro Tip: Watch for the "cheese bridge." When the cheese proteins denature and then reform into a bubbly crust, you have reached the peak of texture.
6. The Rest and Garnish
Remove from the oven and let it sit for five minutes before slicing. Garnish with fresh cilantro and a squeeze of lime using a citrus press.
Pro Tip: This resting period allows for thermal carryover, where the internal temperature stabilizes and the liquids thicken, preventing a "soupy" casserole when you serve it.
The Deep Dive:
When we look at the macro nutrition of our ground beef recipes taco casserole, we see a powerhouse of protein and healthy fats. A standard serving offers roughly 35 grams of protein and 12 grams of fiber, thanks to the inclusion of beans. For my keto friends, simply omit the corn chips and beans; replace them with layers of roasted cauliflower or pork rinds for that essential crunch. For a vegan twist, use a walnut-and-lentil crumble seasoned with liquid smoke to mimic the umami of beef.
The Fix-It: Troubleshooting Your Bake
- Problem: The Soggy Bottom. This happens when there is too much liquid in your salsa or meat. The Fix: Drain your cooked beef thoroughly and simmer your salsa for five minutes to reduce the water content before layering.
- Problem: Greasy Surface. This is caused by using beef with too high a fat content without draining. The Fix: Use a bulb baster to remove excess oil from the skillet before adding your spices.
- Problem: Burnt Cheese. High-sugar toppings can scorch. The Fix: If the cheese is browning too fast, tent the dish with foil for the last ten minutes of baking.
Meal Prep and Reheating Science
To maintain "day-one" quality, store leftovers in airtight glass containers. When reheating, avoid the microwave if possible. Instead, use a toaster oven at 325 degrees. This prevents the chips from becoming rubbery through starch retrogradation and ensures the cheese re-melts into a silky, rather than oily, state.
The Wrap-Up:
You are now armed with the chemical knowledge and technical skills to dominate the dinner table. This ground beef recipes taco casserole is more than just a meal; it is a versatile canvas for your culinary creativity. From the Maillard reaction to the perfect emulsification of spices, you have mastered the "why" behind the "how." Now, go forth, grab your favorite skillet, and turn that pound of beef into a legendary feast that will have everyone asking for your secret.
The Kitchen Table:
Why do my chips get soggy in the casserole?
Soggy chips result from excess moisture in the meat or salsa. To prevent this, drain the beef thoroughly and reduce your sauce until it is thick and viscous before assembly. This maintains the structural integrity of the corn base.
Can I make this casserole ahead of time?
Yes, you can prep the meat and bean layers 24 hours in advance. However, do not add the chips until you are ready to bake. This prevents the chips from absorbing moisture in the refrigerator and becoming mushy.
What is the best beef to use for taco casserole?
An 80/20 or 85/15 ground chuck is ideal. The fat provides necessary moisture and flavor during the browning process. Just ensure you drain the excess rendered fat before adding your spices to avoid a greasy finish.
How do I make my casserole spicier without changing the texture?
Use a microplane to grate fresh habanero or serrano peppers into the beef while it browns. This infuses the fat with heat without adding the bulk or liquid found in extra jars of chunky salsa or hot sauce.