
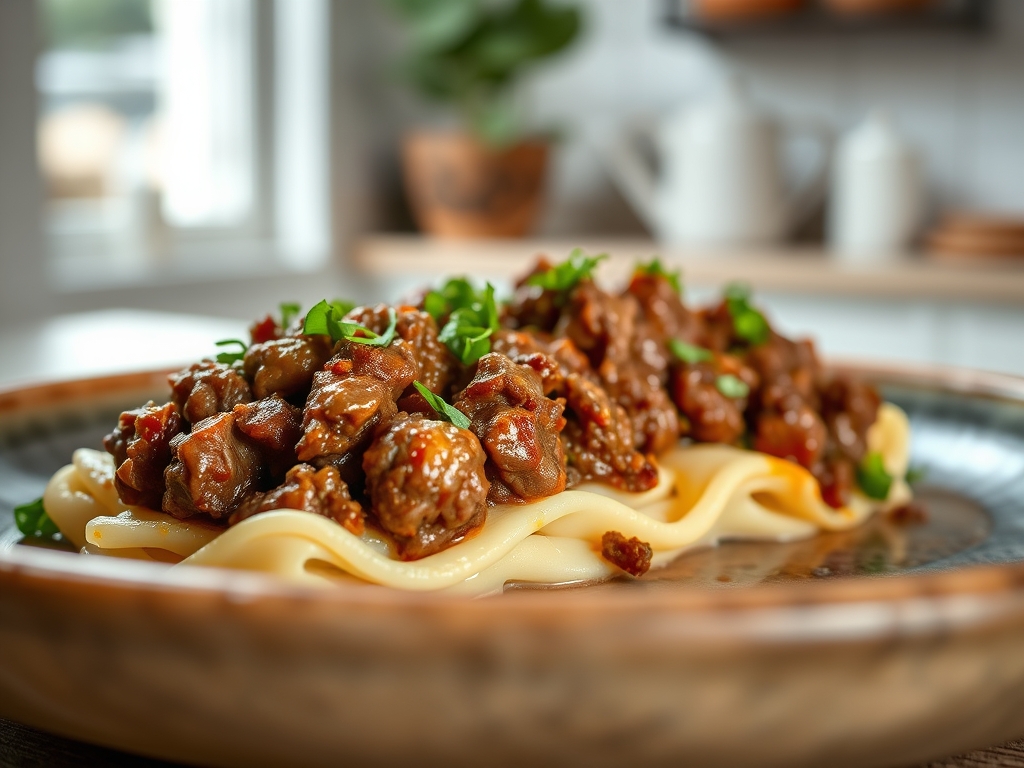
Imagine the scent of searing protein hitting a heavy-bottomed skillet; it is that distinct, savory aroma of the Maillard reaction that signals comfort is on the way. When you combine the savory depth of seared meat with the reliable, leavened lift of a classic baking mix, you unlock a repertoire of bisquick ground beef recipes that define effortless weeknight luxury. We are moving beyond basic casseroles into the realm of structured, textured bakes that satisfy the soul and the stopwatch.
The secret to these bakes lies in the chemistry of the crust. We are looking for that perfect golden hue where the amino acids and reducing sugars dance together under the heat. Whether you are craving a cheeseburger pie with a crumbly topping or a taco bake with a biscuit lid, the versatility of these ingredients is unmatched. It is about creating a dish that feels intentional and artisanal while utilizing the efficiency of modern pantry staples. Grab your favorite apron and let us dive into the mechanics of the perfect bake.
The Gathers:
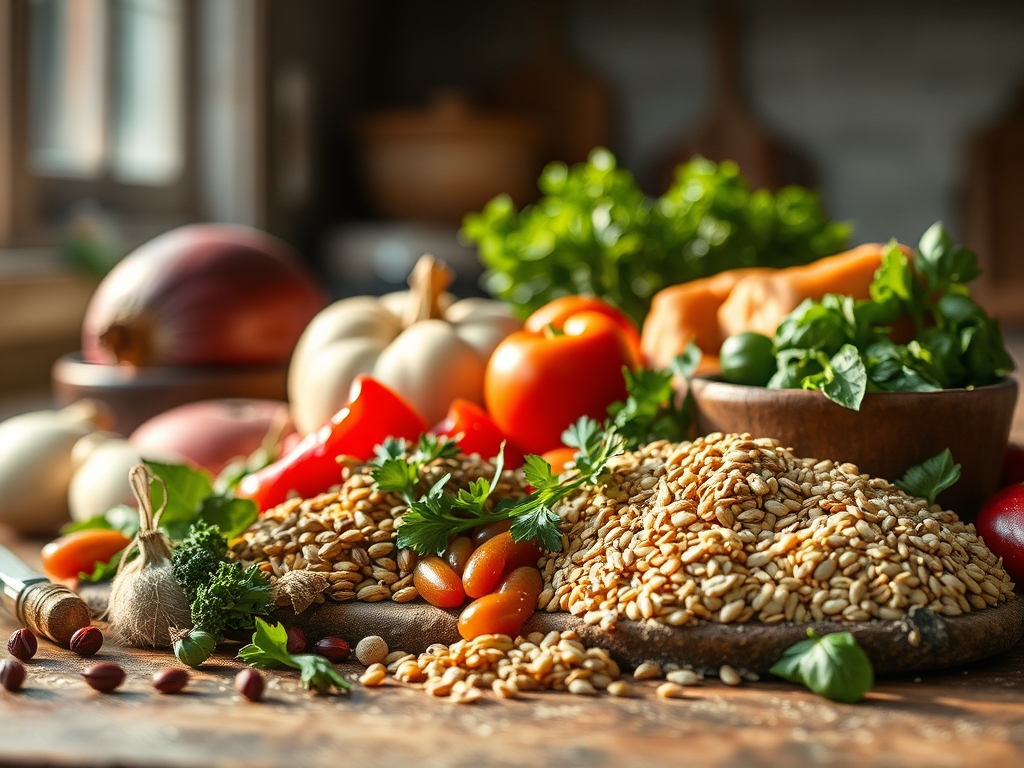
To execute these bisquick ground beef recipes with precision, your mise-en-place must be impeccable. Start with high-quality ground chuck, ideally an 80/20 fat ratio. This specific ratio ensures there is enough lipid content to render out, providing a viscous base for your aromatics without drowning the dish in grease. You will need a digital scale to measure your baking mix; volume measurements are notoriously fickle, but weight ensures a consistent, airy crumb every single time.
Your secondary players include sharp cheddar cheese, which provides a piquant contrast to the rich beef, and heavy cream or whole milk to hydrate the mix. Use a microplane to zest a bit of garlic or onion directly into the batter for an immediate flavor infusion. For smart substitutions, consider swapping ground beef for ground lamb or wagyu for a richer profile. If you find yourself out of the standard mix, a combination of all-purpose flour, double-acting baking powder, and cold, cubed butter worked through with a bench scraper will replicate the necessary leavening power.
The Clock: Efficient Kitchen Flow
Timing is the silent ingredient in every successful meal. For most bisquick ground beef recipes, you are looking at a total commitment of 45 minutes. The "Chef's Flow" dictates that you preheat your oven to 400 degrees Fahrenheit immediately. While the oven reaches thermal equilibrium, spend 10 minutes on the stovetop. Use a heavy-bottomed skillet to brown the meat; this provides the thermal mass needed to sear rather than steam.
The assembly phase takes roughly 5 minutes. You are layering textures, ensuring the meat is evenly distributed before pouring the viscous batter over the top. The final 25 to 30 minutes belong to the oven. This is where the aeration occurs as the leavening agents react to the heat, pushing the dough upward while the bottom absorbs the savory juices from the beef. Always allow for a 5-minute rest period post-bake to let the internal structure set.
The Masterclass: Execution Steps
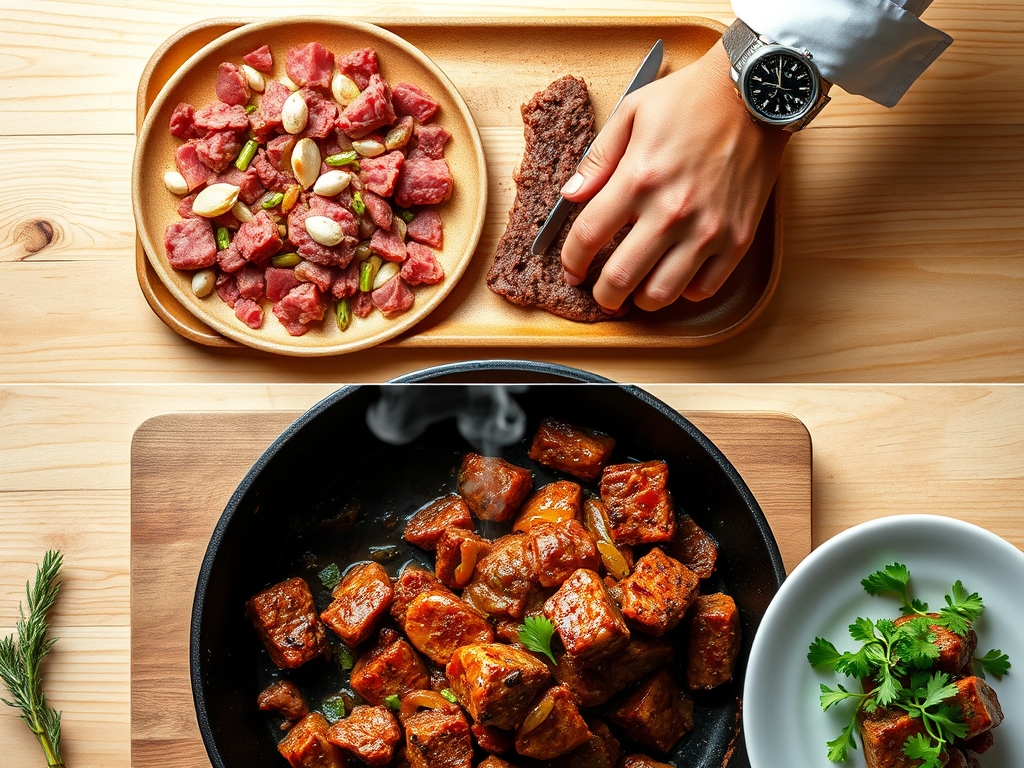
1. The Sear and Render
Place your ground beef in a preheated skillet. Use a wooden spoon or tongs to break the meat into uniform morsels. Do not move the meat too much; let it sit until a deep brown crust forms.
Pro Tip: This is enzymatic browning at work. By allowing the meat to sear undisturbed, you create complex flavor compounds that cannot be replicated by boiling or steaming.
2. Deglaze and Infuse
Once the meat is browned, remove excess fat but leave a thin coating. Add your onions, peppers, or spices. Use a splash of beef stock or dry wine to deglaze the pan, scraping up the "fond" (the brown bits) from the bottom.
Pro Tip: Deglazing incorporates the concentrated proteins back into the sauce, significantly increasing the umami profile of your final bake.
3. Hydrate the Matrix
In a separate bowl, whisk your baking mix with the liquid components. Aim for a consistency that is thick but pourable. Do not overmix; a few lumps are your friends here.
Pro Tip: Overworking the dough develops gluten. For a tender, biscuit-like texture, you want minimal gluten development to keep the crumb delicate and light.
4. Layering for Structural Integrity
Spread the beef mixture into a ceramic baking dish. If using cheese, sprinkle it directly onto the meat before adding the batter. This creates a "glue" layer that prevents the crust from sliding off when sliced.
Pro Tip: Thermal carryover will continue to cook the meat once it is in the oven. Starting with a hot meat base ensures the bottom of the crust begins cooking immediately.
5. The Golden Bake
Pour the batter over the beef, using a saucier or ladle for even distribution. Place the dish on the center rack. Bake until the top is a vibrant golden brown and a toothpick comes out clean.
Pro Tip: The Maillard reaction accelerates at higher temperatures. If the top is browning too fast, a loose tent of foil can reflect radiant heat while allowing the center to set.
6. The Rest and Set
Remove the dish from the oven and place it on a wire rack. Resist the urge to cut into it immediately.
Pro Tip: Resting allows the moisture to redistribute. If you cut it too early, the steam escapes rapidly, leaving the meat dry and the crust soggy.
7. The Final Garnish
Use your microplane to shave fresh parmesan or sprinkle chopped parsley over the top for a pop of color and acidity.
Pro Tip: Adding fresh herbs at the very end preserves their volatile oils, providing a bright olfactory contrast to the heavy, savory bake.
The Deep Dive: Nutrition and Troubleshooting
From a macro perspective, these bakes are protein-heavy powerhouses. A standard serving provides approximately 25g of protein and 30g of carbohydrates. To optimize the nutritional profile, you can swap the beef for 90/10 lean turkey or use a gluten-free baking mix. For a keto-friendly version, replace the mix with a combination of almond flour, eggs, and heavy cream to mimic the rise of a traditional biscuit.
Even the best chefs hit a snag. If your bake is soggy on the bottom, it usually means the meat was too wet; next time, reduce your deglazing liquid further. If the crust is too dense, you likely overmixed the batter or used expired baking powder. If the meat is dry, you may have drained too much fat; remember that lipids provide mouthfeel. For meal prep, reheat slices in an air fryer at 350 degrees for 5 minutes. This restores the crispness of the crust, whereas a microwave will make the dough rubbery.
The Wrap-Up
Mastering bisquick ground beef recipes is like having a culinary superpower in your back pocket. It is the intersection of science and comfort, where simple pantry items are transformed through heat and technique into something truly spectacular. You have the tools, the timing, and the technical know-how to turn a Tuesday night dinner into a gourmet experience. Now, get that skillet hot and start creating!
The Kitchen Table
Can I make these recipes ahead of time?
Yes, you can prep the beef filling up to 24 hours in advance. Store it in the fridge, but wait to mix and add the biscuit topping until just before you are ready to bake to ensure a proper rise.
Why is my biscuit topping flat and heavy?
This usually happens due to overmixing the batter, which develops too much gluten. It can also occur if your baking mix is old; leavening agents lose their potency over time. Always whisk gently until just combined for the best results.
What is the best way to prevent a greasy bake?
Always drain the excess fat after browning your ground beef. While you want some moisture for flavor, leaving too much rendered fat in the pan will soak into the bottom of the crust, making it heavy and oily instead of crisp.
Can I freeze these ground beef bakes?
Absolutely. Wrap individual portions tightly in foil and store in a freezer bag for up to three months. For the best texture, thaw in the refrigerator overnight and reheat in the oven to maintain the structural integrity of the crust.