
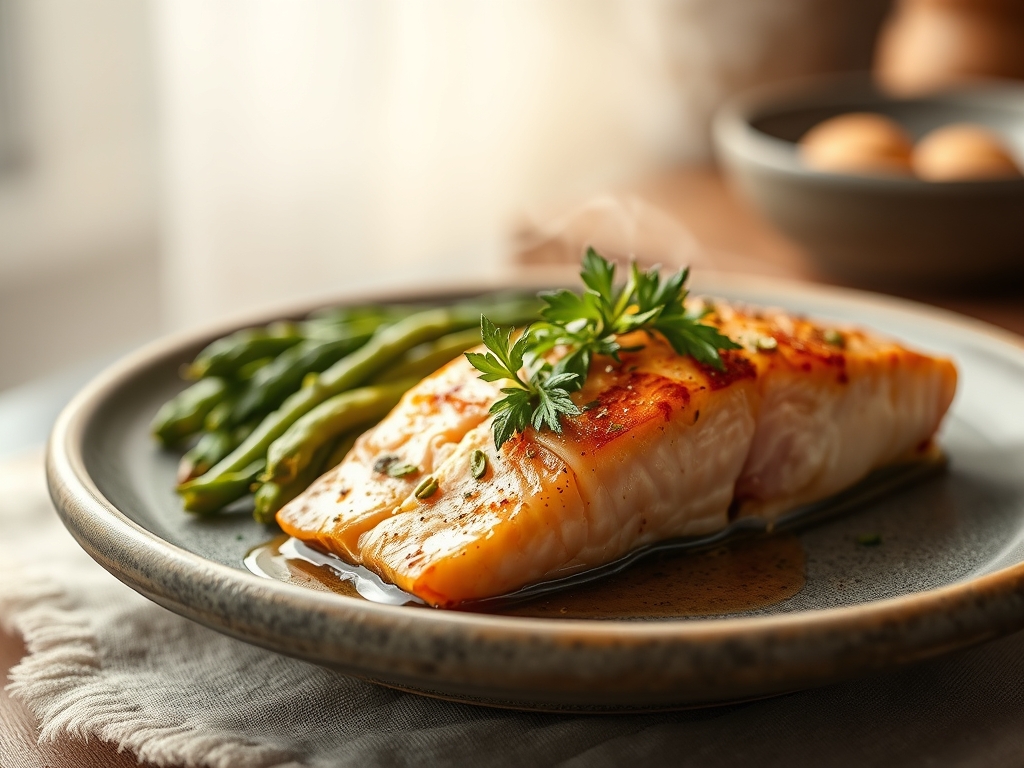
Picture the sound of a gentle sizzle as cold fat meets a preheated sheet pan. The air fills with the scent of toasted citrus and ocean brine while the flesh of the fish transitions from a translucent ruby to a delicate, opaque coral. When searching for easy oven baked salmon recipes, you are likely looking for that perfect intersection of minimal effort and maximum culinary reward. It is the kind of meal that feels like a luxury but requires less active labor than boiling a pot of pasta.
The secret to a restaurant-quality finish lies in understanding how heat interacts with the unique cellular structure of the fish. Salmon is rich in connective tissues that dissolve at lower temperatures than beef or poultry. This means the window between buttery perfection and a dry, chalky mess is incredibly narrow. By mastering a few specific techniques, you can ensure your kitchen produces a consistent, melt-in-your-mouth result every single time. We are going to dive deep into the chemistry of the crust, the physics of carryover cooking, and the art of the emulsion.
The Gathers:
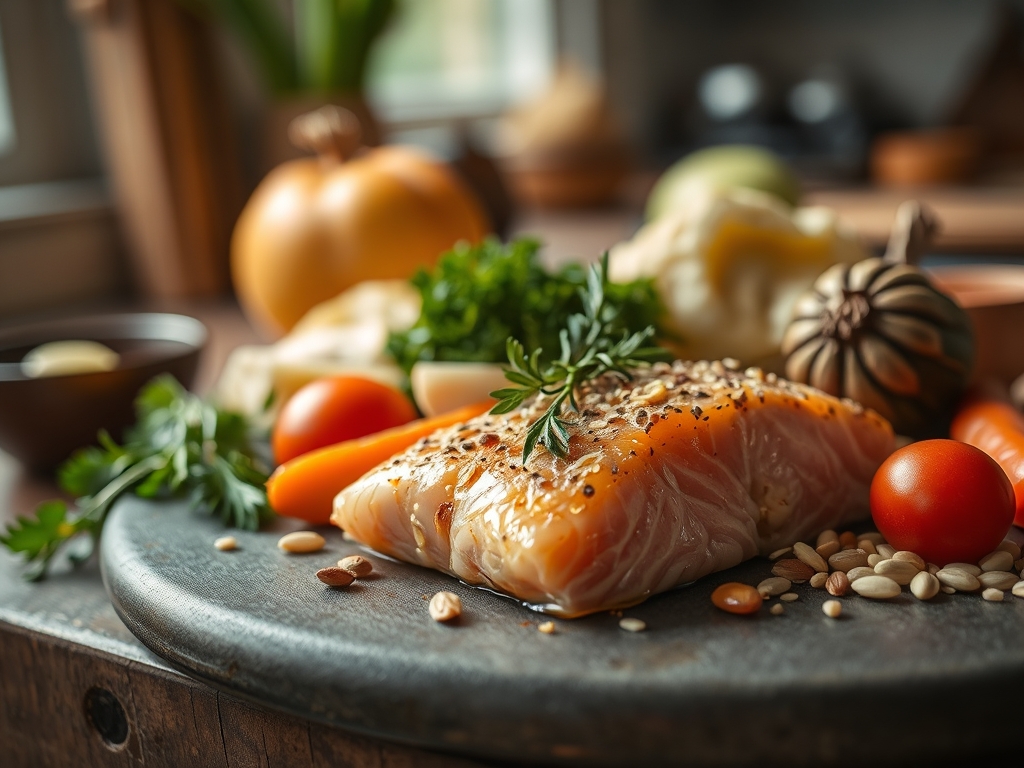
Before you even think about preheating, you must assemble your toolkit and ingredients. Start with a high-quality fillet, preferably center-cut for even thickness. You will need a digital scale to ensure your portions are uniform; this is the only way to guarantee they finish cooking at the exact same moment. For the aromatics, reach for your microplane to zest a lemon. This tool allows you to shave off the oil-rich flavedo without hitting the bitter white pith.
The fat component is non-negotiable. While olive oil is classic, a mixture of melted clarified butter and a touch of honey creates a more viscous glaze that clings to the protein. You will also need a saucier if you plan on whisking together a quick reduction while the fish roasts.
Smart Substitutions:
If you are out of fresh lemons, a splash of verjuice or a high-quality white wine vinegar provides that necessary piquant acidity. No honey? Maple syrup offers a similar sugar profile but adds a deeper, woodsy note that complements the natural oils of the fish beautifully. If you are avoiding dairy, avocado oil provides a high smoke point and a neutral base that lets the herbs shine.
The Clock:
Efficiency in the kitchen is all about what I call the Chef's Flow. Your total active prep time should be exactly 10 minutes, with a cook time ranging from 12 to 15 minutes depending on the thickness of the fillet.
The flow works like this: Preheat your oven to 400 degrees Fahrenheit immediately. While the heating elements infuse the oven cavity with steady radiation, you pat the fish dry and season. By the time the oven chime rings, your fish should be ready to slide in. Use the 12-minute roasting window to prepare a side or clean your bench scraper and cutting board. This ensures that when the timer goes off, you are ready to plate and eat, not stuck at the sink.
The Masterclass:
1. The Desiccation Ritual
Use a paper towel to aggressively pat the skin and flesh dry. Moisture is the enemy of the Maillard reaction. If the surface is wet, the oven's energy is wasted evaporating water instead of browning the protein.
Pro Tip: This is known as surface dehydration. Removing water allows the surface temperature to rise above 212 degrees Fahrenheit quickly, triggering the enzymatic browning that creates complex flavor compounds.
2. The Seasoning Anchor
Season from a height of at least twelve inches to ensure even distribution. Use kosher salt for its jagged crystal structure, which adheres better to the flesh than fine table salt.
Pro Tip: Salt acts as a denaturant. It begins to break down the tightly wound protein coils, allowing them to retain more moisture during the high-heat roasting process.
3. The Fat Barrier
Brush your glaze or oil onto the fish using a silicone pastry brush. Ensure every millimeter is covered. This creates a hydrophobic barrier that prevents the delicate juices from escaping.
Pro Tip: This creates an emulsification on the surface when mixed with the fish's natural oils, resulting in a glossy, professional sheen that looks stunning in photos.
4. The Thermal Buffer
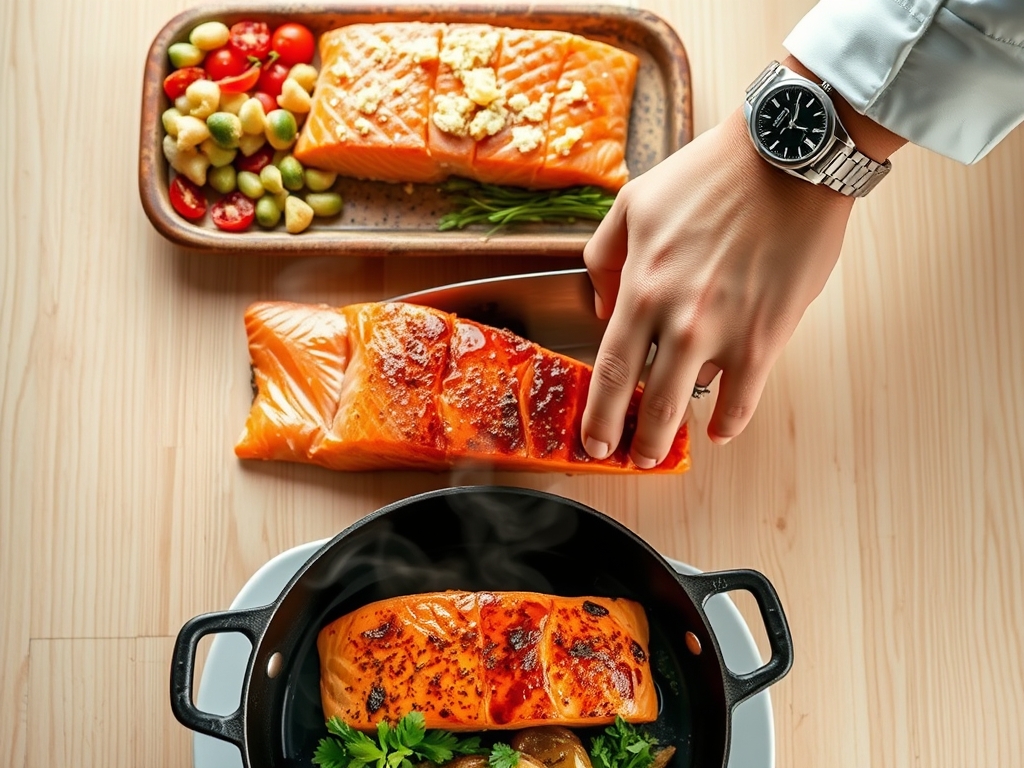
Place the salmon on a heavy-bottomed baking sheet lined with parchment paper. Do not use foil if you want a tender bottom; foil conducts heat too aggressively and can overcook the underside before the top is done.
Pro Tip: A heavy pan provides thermal mass. This prevents the oven temperature from dropping significantly when you open the door to slide the tray in.
5. The Internal Audit
Use a digital meat thermometer to check the internal temperature. Remove the fish when it hits 125 degrees Fahrenheit for a perfect medium-rare.
Pro Tip: This accounts for thermal carryover. The internal temperature will continue to rise by 5 to 7 degrees after you remove it from the oven as the heat moves from the exterior to the center.
6. The Acid Finish
Immediately upon removal, hit the fillets with a fresh squeeze of lemon juice. The cold acid brightens the heavy fats and cuts through the richness.
Pro Tip: Acid balances the pH of the dish. It "wakes up" the taste buds by stimulating saliva production, which helps you perceive the subtle flavors of the fish more intensely.
7. The Rest Period
Let the salmon rest on the pan for exactly three minutes before moving it with tongs or a fish spatula.
Pro Tip: Resting allows the muscle fibers to relax and reabsorb the juices. If you cut into it immediately, the moisture will leak out onto the plate, leaving the fish dry.
The Deep Dive:
Macro Nutrition:
Salmon is a nutritional powerhouse. A standard 6-ounce fillet provides roughly 34 grams of high-quality protein and is loaded with Omega-3 fatty acids. These essential fats are known for reducing inflammation and supporting brain health.
Dietary Swaps:
For a Keto-friendly version, swap the honey in the glaze for a monk fruit sweetener or simply stick to garlic and herbs. For a Vegan alternative, this same roasting technique works wonders on "Tofu Salmon" (pressed extra-firm tofu marinated in beet juice and liquid smoke).
The Fix-It:
- Problem: White gunk (albumin) appearing on the surface. Fix: You are cooking it too fast or too long. Lower the temp or pull it out sooner.
- Problem: The skin is soggy. Fix: Start the fish skin-side down on a preheated pan to crisp it instantly.
- Problem: The seasoning is uneven. Fix: Use a sifter to apply dry rubs for a perfectly uniform coating.
Meal Prep Science:
To reheat salmon without it smelling "fishy," avoid the microwave. The high frequency vibrates water molecules so violently that it ruptures the delicate fat cells. Instead, reheat it in a 275-degree oven with a tablespoon of water covered by a lid to create a gentle steam chamber.
The Wrap-Up:
Mastering easy oven baked salmon recipes is about more than just following a list of ingredients; it is about respecting the chemistry of the protein. By controlling the moisture, monitoring the internal temperature, and allowing for proper carryover cooking, you transform a basic weeknight dinner into a culinary event. Grab your tongs, trust your thermometer, and get ready to enjoy the most succulent fish you have ever tasted.
The Kitchen Table:
How do I know the salmon is done without a thermometer?
Gently press the top of the fillet with a fork. If the flesh flakes easily along the natural white lines (the fat deposits), it is ready. If it resists, it needs two more minutes.
Why is my salmon dry even though it looks pink?
You likely missed the carryover cooking window. Salmon continues to cook after leaving the oven. Always pull it out when it is slightly under your desired doneness to allow it to finish on the counter.
Can I bake salmon straight from the freezer?
It is not recommended. The exterior will overcook and become tough before the center even thaws. For the best texture, always thaw your fish overnight in the refrigerator before roasting.
What is the best rack position for baking salmon?
Place your oven rack in the center position. This ensures even heat distribution from both the top and bottom elements, preventing the bottom from burning before the top is beautifully opaque.