
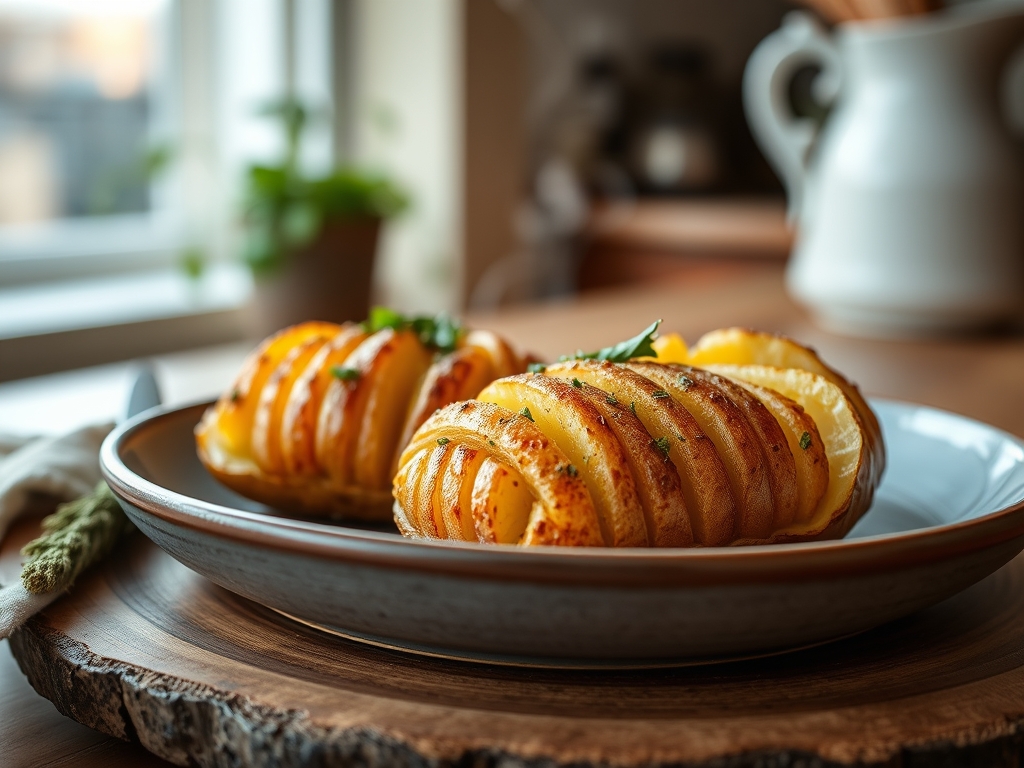
Picture a crisp autumn evening where the air feels like a cold silk sheet and your kitchen smells like a high-end steakhouse in the heart of Manhattan. That scent is the Maillard reaction in its most glorious form. When you are hunting for the best hasselback potato recipes, you are not just looking for a side dish; you are looking for an architectural marvel that bridges the gap between a creamy mashed center and a shatteringly crisp exterior. It is the potato equivalent of an accordion, designed specifically to trap pockets of molten butter and aromatic herbs in every single crevice.
The magic of this dish lies in the surface area. By slicing the tuber into thin, uniform fins, you increase the exposure to dry heat by nearly three hundred percent. This allows for maximum moisture evaporation, which is the precursor to that golden, savory crust we all crave. We are going to dive deep into the molecular mechanics of starch and fat to ensure your next batch is not just good, but technically perfect. Grab your favorite apron and a sharp knife; we are about to transform a humble root vegetable into a masterpiece of culinary engineering.

The Gathers:
To achieve the gold standard of the best hasselback potato recipes, your mise-en-place must be precise. Start with large, starchy Russets or waxy Yukon Golds. Russets provide a floury, high-starch interior that absorbs fat beautifully, while Yukons offer a buttery, viscous texture that holds its shape under high heat. You will need a high-quality fat source; clarified butter is superior here because the milk solids have been removed, raising the smoke point and preventing the bitter taste of burnt protein.
Beyond the tubers, gather fresh rosemary and thyme. Use a microplane to zest a hint of lemon over your sea salt to add a piquant brightness that cuts through the richness. If you want to elevate the umami profile, keep some finely grated Parmigiano-Reggiano or even a dash of nutritional yeast nearby. For those looking for smart substitutions, duck fat is a game-changer for a deeper, more savory crust. If you are keeping it plant-based, a high-quality avocado oil or a cultured vegan butter will provide the necessary lipids without compromising the structural integrity of the potato fins.
The Clock
Efficiency in the kitchen is all about the Chef's Flow. Expect about 15 minutes of active prep time, primarily focused on the precision slicing of the potatoes. The roasting process is where the patience comes in; it typically takes 50 to 60 minutes in a 425 degree Fahrenheit oven.
The flow works like this: preheat your oven while you scrub and dry your potatoes. Total dryness is non-negotiable for crispness. While the potatoes take their first 30-minute bath in the oven to soften the internal cell walls, you can use a saucier to infuse your fats with aromatics on the stovetop. This staggered approach ensures that your herb-infused butter is warm and ready the moment the potato fins begin to fan out, allowing for maximum penetration.
The Masterclass
1. The Precision Cut
Place your potato between two wooden spoons or chopsticks. Using a sharp chef's knife, slice downward until the blade hits the wood. This prevents you from cutting all the way through the base, maintaining a solid foundation. Aim for slices that are about an eighth of an inch thick.
Pro Tip: This technique prevents enzymatic browning by minimizing the time the interior starch is exposed to oxygen before it hits the heat. The wooden guides ensure uniformity, which is critical for even heat distribution.
2. The Initial Dehydration
Place the potatoes on a parchment-lined baking sheet. Brush them lightly with oil and a pinch of salt. Roast for 25 to 30 minutes. At this stage, the heat is working to break down the pectin in the cell walls, making the potato flexible.
Pro Tip: This first roast utilizes evaporative cooling. As moisture leaves the potato, the internal temperature stays stable, preventing the outside from burning before the inside is tender.
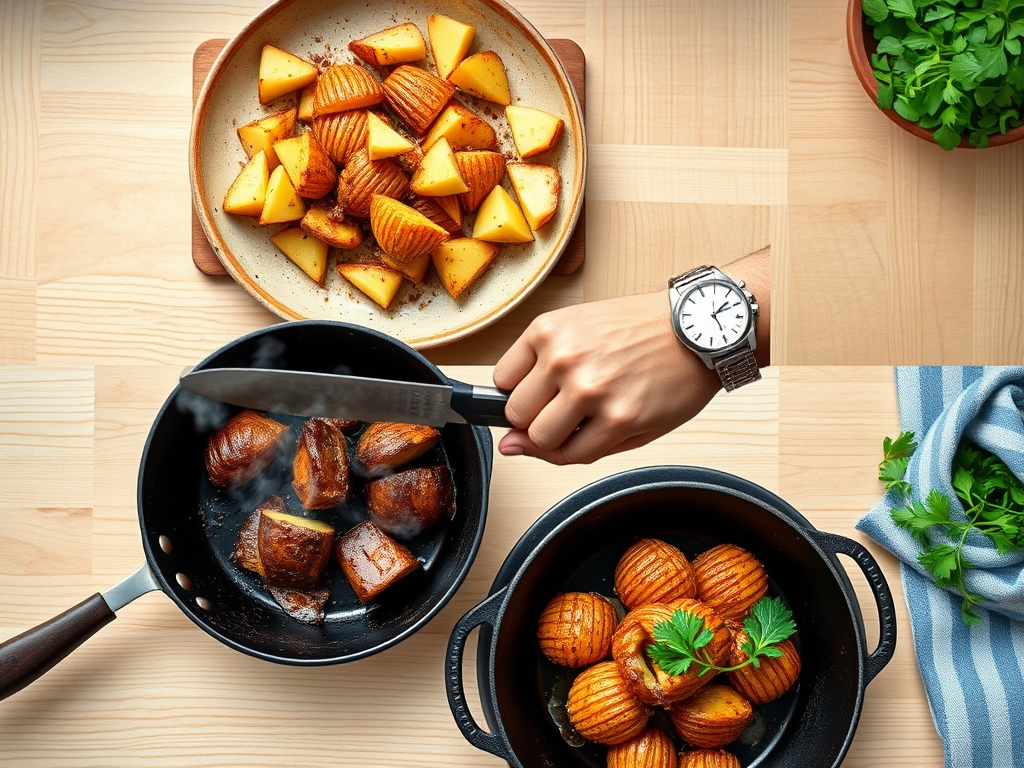
3. The Fan and Infuse
Remove the tray and use tongs to gently nudge the slices apart. They should now fan out easily. Generously brush your infused butter or duck fat into every single gap. Use a digital scale if you want to be precise about fat distribution, but usually, a heavy hand is best here.
Pro Tip: This step maximizes the thermal conductivity of the fat. By filling the gaps, you are creating tiny deep-fryer pockets within each slice, ensuring the edges become incredibly crisp.
4. The Final Crisp
Return the potatoes to the oven for another 25 to 30 minutes. This is when the Maillard reaction goes into overdrive. The sugars and amino acids react under high heat to create hundreds of different flavor compounds and that iconic brown color.
Pro Tip: Watch for thermal carryover. Remove the potatoes when they look just slightly under-done; the internal residual heat will continue to cook the center for several minutes after they leave the oven.
5. The Finishing Touches
Once out of the oven, use a bench scraper to easily lift the potatoes from the tray. Sprinkle with fresh herbs and a final dusting of salt while the fat is still viscous so the seasoning adheres perfectly.
Pro Tip: Adding fresh herbs at the very end preserves their volatile oils, which would otherwise dissipate or turn bitter if exposed to the high heat of the full roasting cycle.
The Deep Dive
From a macro perspective, a medium-sized hasselback potato provides roughly 160 calories from the potato itself, plus whatever fats you choose to render or add. It is a powerhouse of potassium and Vitamin C. For those with dietary restrictions, this dish is naturally gluten-free. To make it Keto-friendly, use smaller radishes or turnips treated with the same slicing technique. For a vegan version, use a high-smoke-point olive oil and finish with a sprinkle of smoked paprika for a "bacon-like" depth.
The Fix-It: Common Pitfalls
If your potato is "floppy," you likely did not roast it long enough during the second phase; return it to a higher heat for five minutes. If the bottom is burnt but the top is raw, move your rack higher in the oven to balance the convection currents. If the slices are sticking together, you didn't use enough fat during the "Fan and Infuse" stage. Use a small knife to gently pry them apart and add a drop more oil.
For meal prep, reheating is a science. Avoid the microwave, which turns the starch into a gummy mess. Instead, use a heavy-bottomed skillet over medium heat with a teaspoon of oil. Cover the pan for two minutes to steam the center, then uncover for three minutes to re-crisp the base. This restores "day-one" quality by re-emulsifying the fats.
The Wrap-Up
Mastering the best hasselback potato recipes is a rite of passage for any home cook who wants to blend artistry with technical skill. It is about understanding how heat interacts with starch and how fat acts as the ultimate flavor vehicle. When you pull that tray out of the oven and see those shimmering, golden ridges, you will know the effort was worth it. These potatoes are the ultimate showstopper, guaranteed to turn a simple weeknight dinner into a gourmet event. Go ahead and flaunt those kitchen skills; you have earned it.
The Kitchen Table
Which potato is best for Hasselback?
Russets are ideal for a fluffy interior and maximum crispness due to high starch content. Yukon Golds offer a creamier, richer texture and hold their shape better during the precision slicing process. Both work beautifully depending on your texture preference.
How do I keep the potato from rolling?
Slice a very thin sliver off the bottom of the potato to create a flat, stable base. This prevents the tuber from rolling while you make your precision slices and ensures it sits evenly on the baking sheet for uniform roasting.
Can I make these ahead of time?
You can slice the potatoes in advance, but store them in a bowl of cold water to prevent oxidation. Pat them completely dry before roasting. For best results, do the second roast right before serving to maintain the crisp texture.
Why are my potatoes not fanning out?
The "fan" happens as moisture evaporates and the internal structure softens. If they stay closed, you may need to roast them longer during the first stage or gently use a knife to separate the slices before applying the second coat of fat.