
Close your eyes and listen for that distinctive, aggressive hiss the second cold protein meets a searing grate. That sound is the overture to the perfect summer evening. We have all been there; staring at a dry, chalky breast that tastes more like a yoga mat than a meal. But when you master easy chicken recipes for grill, you are not just cooking; you are orchestrating a complex series of chemical reactions that transform humble poultry into a succulent masterpiece. We are chasing that elusive balance of a charred, piquant exterior and a center so juicy it requires a stack of napkins. It is about understanding how heat moves through muscle fibers and why a simple splash of acid can change everything. Forget the guesswork and the frantic poking with a fork. We are going to dive deep into the mechanics of fire and flesh. By the time we are done, you will handle your grill with the confidence of a seasoned pitmaster and the precision of a laboratory chemist. Let us get those coals glowing.
The Gathers:
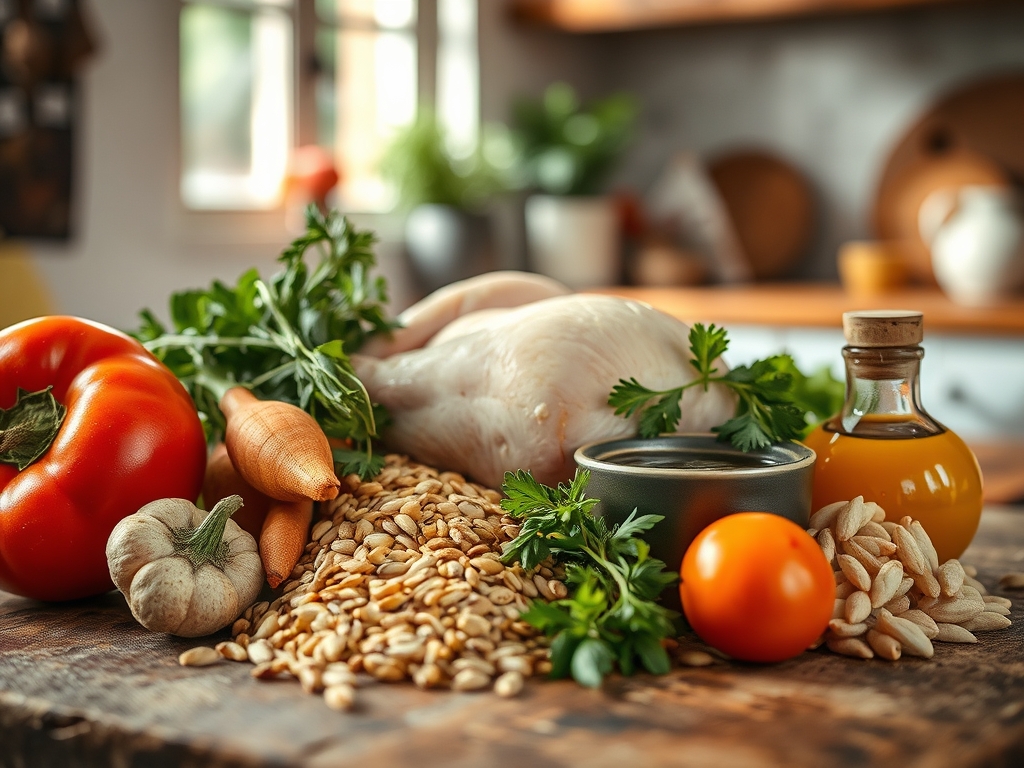
Before we strike a single match, your mise-en-place must be airtight. Professional kitchens run on organization; you should too. Start with high-quality poultry, preferably air-chilled to ensure the skin remains dehydrated for maximum crunch. You will need a viscous marinade base, typically a high-smoke-point oil like avocado oil, which acts as a thermal conductor. Gather your aromatics: fresh garlic cloves to be crushed with a bench scraper, woody herbs like rosemary or thyme, and a hit of acidity from lemon zest via a microplane.
The "Smart Substitutions" are your secret weapon for flavor profile shifts. If you lack fresh citrus, a splash of apple cider vinegar provides the necessary protons to break down tough connective tissues. Out of honey? Use agave or maple syrup; both contain the reducing sugars required for the Maillard reaction. If you are avoiding nightshades, swap paprika for ground turmeric and toasted cumin to maintain a vibrant, golden hue without the heat. Always keep a digital scale nearby to measure your salt by weight rather than volume. This ensures a precise 1.5 percent salinity, which is the "goldilocks zone" for moisture retention through osmosis.
The Clock:
Efficiency in the kitchen is all about the "Chef's Flow." Total active prep time should clock in at 20 minutes, while the passive marination requires at least two hours for the brine to infuse the deep muscle tissues. If you go over six hours with a high-acid marinade, you risk denaturing the proteins into a mushy texture.
The actual cook time varies by cut: 12 to 15 minutes for boneless thighs and 18 to 22 minutes for bone-in pieces. However, we do not cook by the clock; we cook by internal temperature. Factor in a mandatory 10-minute rest period. This is not just a suggestion; it is a thermal necessity. During this time, the internal pressure stabilizes, allowing the juices to redistribute rather than flooding your cutting board.
The Masterclass:
1. The Dry Brine Protocol
Start by patting your chicken completely dry with paper towels. Moisture is the enemy of a good sear because energy is wasted evaporating surface water before browning can begin. Rub a generous amount of kosher salt over and under the skin.
Pro Tip: This process utilizes osmosis to draw moisture out, dissolve the salt, and then pull that seasoned brine back into the cells, seasoning the bird to the bone.
2. Calibrate Your Zones
Create a two-zone fire on your grill. Heap your coals on one side or turn half your gas burners to high. This allows you to sear the exterior over direct heat and finish the cooking process over indirect heat.
Pro Tip: Using two zones prevents flare-ups from rendered fat, which can cause soot buildup and a bitter, carbonized flavor on your meat.
3. The Aerate and Marinate Phase
Whisk your marinade in a saucier or glass bowl until it is fully emulsified. Submerge your chicken, ensuring every crevice is coated. The oil protects the meat from the harsh, drying effects of the wind and heat.
Pro Tip: Fats in the marinade act as a solvent, extracting fat-soluble flavor compounds from herbs and spices that water-based liquids simply cannot reach.
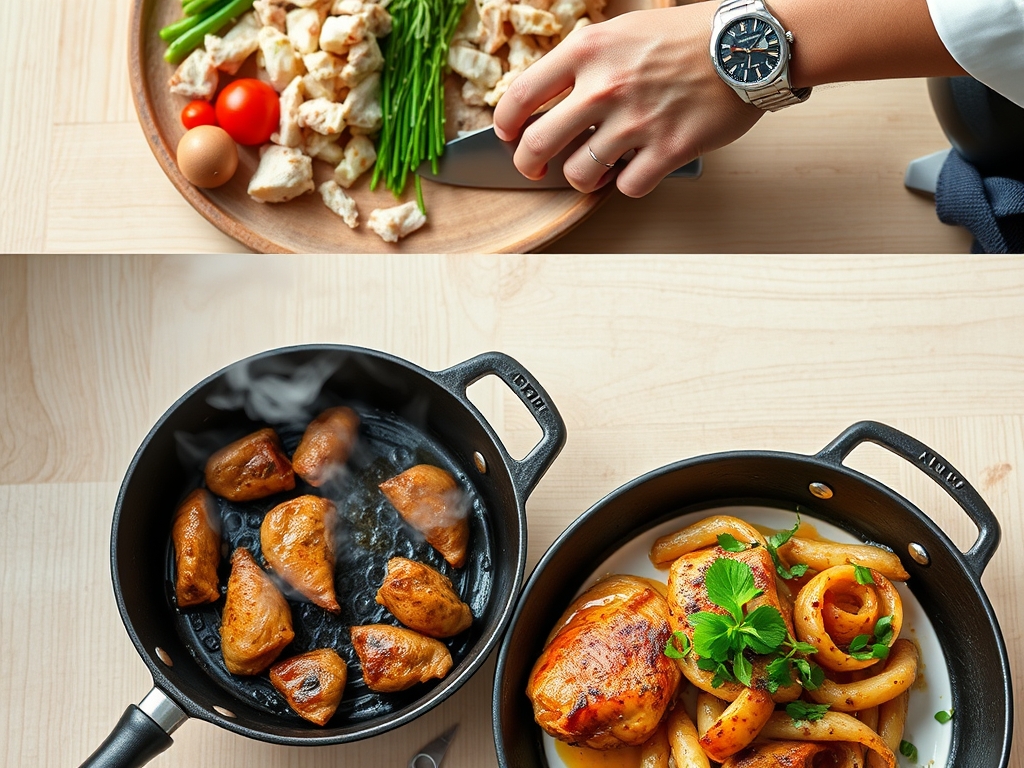
4. The Searing Strike
Place the chicken skin-side down over the hot zone. Use heavy-duty tongs to press the meat firmly against the grates for maximum contact. Do not move it for at least three minutes.
Pro Tip: This initiates the Maillard reaction, a chemical dance between amino acids and sugars that creates hundreds of new flavor compounds and that iconic brown crust.
5. Managing Thermal Carryover
Once the skin is crispy, move the chicken to the cool side of the grill. Close the lid to create an oven-like environment. Pull the chicken off the heat when your digital thermometer reads 160 degrees Fahrenheit.
Pro Tip: Thermal carryover will cause the internal temperature to rise another 5 degrees while resting, bringing it to the FDA-recommended 165 degrees without overcooking.
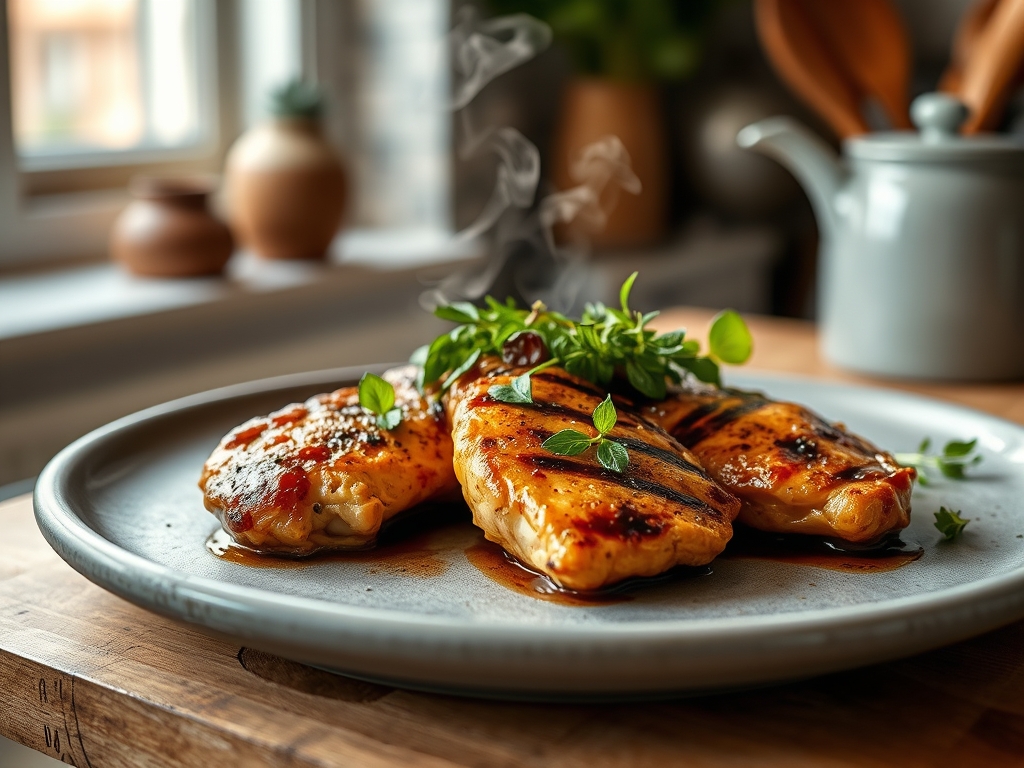
6. The Glaze Application
If using a sugary sauce, apply it only during the final five minutes of cooking. Use a silicone brush to coat the pieces evenly.
Pro Tip: Sugars like fructose and glucose have low burning points. Applying them too early leads to pyrolysis, which turns your delicious sauce into acrid, black charcoal.
7. The Final Rest
Transfer the chicken to a warm platter and tent loosely with foil. Let it sit undisturbed. This is the hardest part, but it is the most critical for a "day-one" juicy texture.
Pro Tip: Resting allows the protein filaments to relax and re-absorb the liquid that was squeezed toward the center during the high-heat phase of cooking.
The Deep Dive:
From a macro nutrition perspective, grilled chicken is a powerhouse. A standard 6-ounce serving of skinless breast offers roughly 50 grams of lean protein with minimal saturated fat. If you are following a Keto protocol, keep the skin on to boost healthy fats and satiety. For Vegan guests, apply these same marinating and two-zone grilling techniques to extra-firm tofu or cauliflower steaks; the science of flavor infusion remains identical. Gluten-Free diners should simply ensure their soy sauce or liquid aminos are certified GF.
The "Fix-It" guide for common pitfalls:
- The Rubber Skin: This happens when the heat is too low to render the subcutaneous fat. Fix it by finishing the chicken skin-side down over high heat for sixty seconds at the very end.
- The Raw Center: If the outside is charred but the inside is cold, your fire was too hot. Use your tongs to move the meat to the indirect zone and close the lid to finish via convection.
- The Stick Factor: If the chicken clings to the grate, it is not ready to flip. The meat will naturally "release" once the proteins have sufficiently coagulated and browned.
For meal prep, reheating is a delicate science. Avoid the microwave, which vibrates water molecules and toughens the protein. Instead, use a heavy-bottomed skillet with a splash of chicken stock over medium heat. This creates a steam-jacket effect that restores moisture without sacrificing the texture of the sear.
The Wrap-Up:
Grilling is more than just a way to make dinner; it is a celebration of texture, temperature, and technique. By mastering these easy chicken recipes for grill, you have graduated from a casual cook to a backyard scientist. You now understand that the perfect drumstick is a result of controlled chemical reactions and precise thermal management. So, grab your tongs, trust your digital thermometer, and let the smoke do its magic. Your friends will thank you, your palate will reward you, and you will never look at a piece of poultry the same way again. Now, go fire up that grill and make something legendary.
The Kitchen Table:
How do I keep chicken from sticking to the grill?
Ensure your grates are scrubbed clean and preheated. Coat the chicken in a high-smoke-point oil. Most importantly, do not flip the meat until the Maillard reaction is complete; the chicken will naturally release from the metal once seared.
What is the best temperature to pull chicken off the grill?
Remove the chicken from the heat when a digital thermometer reads 160 degrees Fahrenheit. The internal temperature will continue to rise to the safe 165-degree mark during the resting phase due to the scientific principle of thermal carryover.
Can I use frozen chicken for these recipes?
For the best results, always thaw chicken completely in the refrigerator before grilling. Frozen centers cook unevenly, leading to a charred exterior and a dangerously raw interior. Thawing ensures the heat penetrates the muscle fibers at a consistent rate.
Why is my grilled chicken always dry?
Dryness usually results from overcooking or skipping the rest period. High heat squeezes moisture out of the protein cells. Resting the meat for ten minutes allows those juices to redistribute, ensuring a succulent bite every single time you cook.